My LaTeX Workflow – Editor
- Published on

Choosing and configuring a LaTeX editor is a somewhat important topic as I spend so much of my time in it. In this blog post, I want to explain my editor setup, in order to give you a nice starting point and hopefully a few good ideas you might want to adapt. When reading this post, please keep in mind, that all the configurations have to work for you, i.e., use my settings below as a template but adapt them to your specific likings. After all, the setup has to be useful for you to give you a productivity boost.
Reasons for using a general-purpose Editor
There are many dedicated LaTeX editors out there, but I use none of them. Instead, I use a general-purpose editor, i.e., an editor that can be used for all programming languages and any other writing on a computer. The reason for this is rather straightforward:
I only have to learn one editor for all my coding work. This is such a great advantage that it outdoes any conveniences a dedicated LaTeX editor might have. And, I have yet to find a LaTeX related task that cannot be done in my editor. All writing in LaTeX, developing this website, experimenting in Jupyter notebooks, theorem proving with Lean and writing this very blog post, everything is done in the same editor.
Configuring an editor can be complicated, so why should anyone want to configure more than one editor?
Setting up a spell checker and teaching it the scientific phrases you use every day is both important and works differently in every editor. If you use one editor for everything you do this once, if you have more than one editor you will probably not set up a spellchecker in each of them and synchronize the dictionaries between them. So if you are not using one already, try a general-purpose editor.
Visual Studio Code
My editor of choice is Visual Studio Code. Why? Because:
- VS Code is free and developed by Microsoft, meaning there is enough development power behind it such that it will exist for many years to come.
- If you do not like the look of something in the editor it is really easy to configure it. However, and that is even better than configurability, the default settings are chosen sensibly, so there is little need to change a lot.
- If a new project gets developed these days, chances are high that the project also has a VS Code extension and most likely none for any other editor. Proving theorems in Lean? There is an extension. Plotting with Penrose? There is an extension.
While most of this blog post is targeted towards VS Code, I hope that a few points can also be helpful for other editors. But you really should give VS Code a try.
General Configurations
There is an extensive documentation so I won't explain how to get started with Visual Studio code, but focus on the configurations for LaTeX. Press Cmd+Shift+P, search for Preferences: Open Settings (JSON) and press Enter to open your settings file.
Here you can copy and paste statements like
"telemetry.telemetryLevel": "off",
to disable sending information to Microsoft or
"workbench.colorCustomizations": {
  "statusBar.background": "#2C2C2C",
  "statusBar.noFolderBackground": "#2C2C2C",
  "statusBar.debuggingBackground": "#2C2C2C"
},
to set a more pleasing color for the blue status bar at the bottom (depending on your installation this might not be necessary).
Editor settings
The font of my choice is Fira Code. After installation you can add it to VS Code like this: json:settings.json "editor.fontFamily": "Fira Code", "editor.fontLigatures": true, "editor.fontSize": 16,
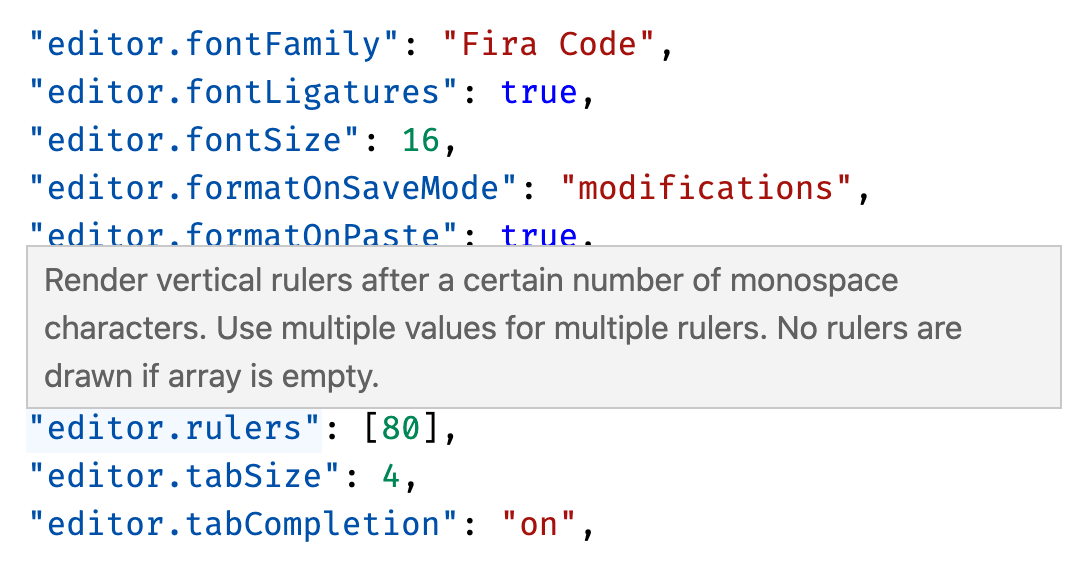
I also made the following other settings regarding the general behavior of the editor.
"editor.formatOnSaveMode": "modifications",
"editor.formatOnPaste": true,
"editor.guides.bracketPairs": true,
"editor.minimap.enabled": false,
"editor.renderControlCharacters": true,
"editor.rulers": [80],
"editor.tabSize": 4,
"editor.tabCompletion": "on",
Luckily I don't have to explain them here, as VS Code has a nice built-in documentation. Paste the code snippet into your settings.json file, hover one of the lines and a short description will appear.
Delete, modify or comment out the lines based on your workflow. And yes, you can use comments in this setting file. Use them extensively to document your settings for your future self.
/_
Multi line comment
_/
Hide unnecessary files
LaTeX generates a lot of temporary files you probably do not want to see in your file explorer. Hide them using the following setting:
	"files.exclude": {
		"**/.git": true,
		"**/*.aux": true,
		"**/*.bbl": true,
		"**/*.bcf": true,
		"**/*.blg": true,
		"**/*.fdb_latexmk": true,
		"**/*.fls": true,
		"**/*.glg": true,
		"**/*.glo": true,
		"**/*.gls": true,
		"**/*.glsdefs": true,
		"**/*.idx": true,
		"**/*.ilg": true,
		"**/*.ind": true,
		"**/*.lof": true,
		"**/*.log": true,
		"**/*.lot": true,
		"**/*.mw": true,
		"**/*.nlo": true,
		"**/*.nls": true,
		"**/*.out": true,
		"**/*.run.xml": true,
		"**/*.synctex.gz": true,
		"**/*.thm": true,
		"**/*.toc": true,
		"**/*.xdy": true
	},
LaTeX Workshop
The most important VS Code extension when writing LaTeX is LaTeX Workshop.
It can do a lot (Compiling, Viewing & SyncTeX, Formatting, ...), probably more than your standard dedicated LaTeX editor. So please make sure to have a look a LaTeX Workshop's website for a more detailed list of features. In the following, I will explain how I configured LaTeX Workshop. However, as the default settings of LaTeX Workshop are pretty good, there is not too much to do.
The LaTeX Workshop Panel
The extension will add a new panel to the menu on the left panel, which holds the visible functionality of LaTeX Workshop.
The panel contains three drawers:
- Commands, which holds several buttons to trigger compilations, PDF viewing, BibTex formatting and more. As we will configure the LaTeX Workshop such that (almost) everything is done automatically we won't need this a lot.
- Structure, this panel shows the heading structure of your document. Clicking one of the items will open the corresponding file at the position of the heading.
- Snippet View: Cannot remember the LaTeX command for a symbol or need a code snippet for TikZ? The snippets view inserts the correct code after clicking on the symbols. It's a nice feature, but I don't really use it as the autocomplete functionality is rather good.
So far for the visual features of LaTeX Workshop, let's now cover the others.
Compiling
LaTeX Workshop will compile the document whenever an associated file is saved. This works even if the file was modified outside of Visual Studio Code or if the file isn't a .tex file but an image. This is a very convenient feature and works well with the default settings.
How do we tell LaTeX Workshop what compilation it should do?I have two requirements regarding this:
- By default, the document should be compiled using
pdflatexandbibtex. - It should be easily possible to automatically use
xelatex,lualatexandbiberon a per project basis.
The first requirement is for general multi-author papers, as most journals and researchers still use a workflow based on pdflatex. Sometimes, if you are writing the LaTeX code for your own (thesis, lecture notes, grant proposals, ...) you probably want to switch to xelatex or lualatex, as they provide more features and offer a very fine control for font specific settings. This is the reason for the second requirement. As always, I want to keep the configuration as simple as possible such that nothing will break when LaTeX Workshop introduces new features or changes old ones.
To handle the first requirement, add the following line to your global settings.json:
"latex-workshop.latex.recipe.default": "pdflatex ➞ bibtex ➞ pdflatex × 2",
This means, by default LaTeX workshop will run pdflatex, bibtex and finally pdflatex twice if it detects a file change.
For the project-based settings, we have to create two files. First a project file with a .code-workspace file extension at the root of the project with the following content:
{
	"folders": [
		{
			"path": "."
		}
	],
	"settings": {
		"latex-workshop.latex.recipe.default": "latexmk (latexmkrc)",
	}
}
This instructs LaTeX Workshop to use latexmk with configurations specified by the following .latexmkrc file, which is also located at the root of the project.
# Set the program used to generate the PDF
# 1: pdflatex
# 2: postscript conversion, don't use this
# 3: dvi conversion, don't use this
# 4: lualatex
# 5: xelatex
$pdf_mode = 5;

set_tex_cmds("-interaction=nonstopmode -file-line-error -synctex=1 %O %S");
Magic comments offer an alternative way to make the project-based settings work. However, LaTeX Workshop recommends against using them and support for them is disabled by default.
Working with multiple Files
When writing LaTeX it is common to split the input file into several subfiles containing one section per file. So how do we tell LaTeX Workshop which file should be compiled when changing one of the subfiles? We add the following comment to the top of the subfile, with the correct path to the main file.
% !TEX root = ./path/to/main.tex

Content of the subfile
Linting
Linting is similar to spell checking but instead of detecting spelling or grammar mistakes it detects programming errors and inconsistencies.
LaTeX Workshop lints the files using chktex with other linters possibly coming in the future. To lint your files, chktex needs to be installed (this is normally the case as chktex is a part of TeXLive) and linting must be enabled by adding the following setting to your settings.json file: json:settings.json "latex-workshop.chktex.enabled": true,
Currently, there are 46 checks implemented chktex, all of which we can set as errors, warnings, messages or disabled entirely. We configure them as follows: First, we use the -wall flag to convert all checks to be warnings. Then we disable a variety of checks (using -n<check_id>) or promote them to errors (using -e<check_id>). Please refer to the
chktex documentation for an explanation of the different ids. My current configuration of chktex is: json:settings.json "latex-workshop.chktex.args.active": [ "-wall", "-n1", "-n9", "-n11", "-e16", "-n17", "-n21", "-n22", "-n26", "-n30", "-n35", "-n46", "-q", ],
It is possible to configure checktex using a chktexrc file. I might swicht to a setup including one in the future.
Snippets for Autocompletion
LaTeX Workshop offers a variety of autocomplete snippets that can speed up writing LaTeX a lot.
For example, writing BEQ and pressing Tab will generate the following code block:
\begin{equation}
\end{equation}
There are snippets for the most common environments and sectioning commands as well as for greek letters, mathematical symbols and font commands. Have a look at the documentation to learn more.
Sometimes, however, the predefined snippets aren't enough. Let me explain how you can create your own. Open the command palette using Cmd+Shift+P, search for Preferences: Configure User Snippets, press Enter, search for LaTeX and press Enter again. A special file open in which you can define your snippets. Here is a first example:
"alignat": {
  "prefix": "alignat",
  "body": [
    "\\begin{alignat}{1}",
    "\t$0",
    "\\end{alignat}"
  ],
  "description": "alignat environment"
},
This snippet has the effect that if you start typing the prefix, i.e., here the word alignat, VS Code will offer an autocompletion which you then can accept by pressing Tab. This produces the following lines:
\begin{alignat}{1}
	I
\end{alignat}
Your cursor is placed at the position of the $0 here indicated by an I. Note, that you have to escape the character \, this means you have to enter \\ to produce a single \. The command \t inserts a tab indentation.
Next, let me give an example of multiple synchronous tab stops. After autocompleting the following snippet, a cursor is positioned in each of the \begin{} and \end{} parentheses. Enter your environment name and pres Tab upon which the cursor will be positioned at the $0 location.
{
	"begin": {
		"prefix": "begin",
		"body": [
			"\\begin{${1:environment}}",
			"\t$0",
			"\\end{${1:environment}}"
		],
		"description": "begin an environment"
	},
}
Here is the complete snippets file I use currently (scroll to see everything):
{
	// Place your snippets for tex here.
	// Each snippet is defined under a snippet name
	// and has a prefix, body and description.
	// The prefix is what is used to trigger the snippet
	// and the body will be expanded and inserted.
	//
	// Possible variables are:
	// $1, $2 for tab stops,
	// $0 for the final cursor position,
	// and ${1:label}, ${2:another} for placeholders.
	// Placeholders with the same ids are connected.
	"alignat": {
		"prefix": "alignat",
		"body": [
			"\\begin{alignat}{1}",
			"\t$0",
			"\\end{alignat}"
		],
		"description": "alignat environment"
	},
	"begin": {
		"prefix": "begin",
		"body": [
			"\\begin{${1:environment}}",
			"\t$0",
			"\\end{${1:environment}}"
		],
		"description": "begin an environment"
	},
	"corollary": {
		"prefix": "corollary",
		"body": [
			"\\begin{corollary}[$1]",
			"\t$0",
			"\\end{corollary}"
		],
		"description": "corollary environment"
	},
	"definition": {
		"prefix": "definition",
		"body": [
			"\\begin{definition}[$1]",
			"\t$0",
			"\\end{definition}"
		],
		"description": "definition environment"
	},
	"description": {
		"prefix": "description",
		"body": [
			"\\begin{description}",
			"\t\\item[$1] $0",
			"\\end{description}"
		],
		"description": "description environment"
	},
	"enumerate": {
		"prefix": "enumerate",
		"body": [
			"\\begin{enumerate}",
			"\t\\item $0",
			"\\end{enumerate}"
		],
		"description": "enumerate environment"
	},
	"figure": {
		"prefix": "figure",
		"body": [
			"\\begin{figure}[H]",
			"\t\\centering",
			"\t\\includegraphics[width=\\textwidth]{$1}",
			"\t\\caption{\\textbf{$2:} $3}",
			"\t\\label{fig:$0}",
			"\\end{figure}"
		],
		"description": "figure environment"
	},
	"itemize": {
		"prefix": "itemize",
		"body": [
			"\\begin{itemize}",
			"\t\\item $0",
			"\\end{itemize}"
		],
		"description": "itemize environment"
	},
	"lemma": {
		"prefix": "lemma",
		"body": [
			"\\begin{lemma}[$1]",
			"\t$0",
			"\\end{lemma}"
		],
		"description": "lemma environment"
	},
	"pmatrix": {
		"prefix": "pmatrix",
		"body": [
			"\\begin{pmatrix}",
			"\t$1 & $2 \\\\\\",
			"\t$3 & $0 \\\\\\",
			"\\end{pmatrix}"
		],
		"description": "pmatrix environment"
	},
	"proof": {
		"prefix": "proof",
		"body": [
			"\\begin{proof}",
			"\t$0",
			"\\end{proof}"
		],
		"description": "proof environment"
	},
	"proposition": {
		"prefix": "proposition",
		"body": [
			"\\begin{proposition}[$1]",
			"\t$0",
			"\\end{proposition}"
		],
		"description": "proposition environment"
	},
	"subalignat": {
		"prefix": "subalignat",
		"body": [
			"\\begin{subequations}",
			"\t\\begin{alignat}{1}",
			"\t\t$0",
			"\t\\end{alignat}"
			"\\end{subequations}"
		],
		"description": "subequations & alignat environment"
	},
	"subfigure": {
		"prefix": "subfigure",
		"body": [
			"\\begin{subfigure}[b]{0.3\\textwidth}",
        	"\t\\includegraphics[width=\\textwidth]{$1}",
        	"\t\\caption{$0}",
        	"\t\\label{fig:$2}",
    		"\\end{subfigure}"
		],
		"description": "subfigure environment"
	},
	"table": {
		"prefix": "table",
		"body": [
			"\\begin{table}[h]",
			"\t\\caption{$1}",
			"\t\\begin{tabular}{ c c }",
			"\t\t\\toprule",
			"\t\t$2 & $3 \\\\\\",
			"\t\t\\midrule",
			"\t\t$4 & $5 \\\\\\",
			"\t\t$6 & $7 \\\\\\",
			"\t\t\\bottomrule",
			"\t\\end{tabular}",
			"\\end{table}"
		],
		"description": "table environment"
	},
	"tabular": {
		"prefix": "tabular",
		"body": [
			"\\begin{tabular}{ c c }",
			"\t\\toprule",
			"\t$1 & $2 \\\\\\",
			"\t\\midrule",
			"\t$3 & $4 \\\\\\",
			"\t$5 & $6 \\\\\\",
			"\t\\bottomrule",
			"\\end{tabular}"
		],
		"description": "tabular environment"
	},
	"theorem": {
		"prefix": "theorem",
		"body": [
			"\\begin{theorem}[$1]",
			"\t$0",
			"\\end{theorem}"
		],
		"description": "theorem environment"
	}
}
Other Features of LaTeX Workshop
LaTeX Workshop offers many more features. However, for these features, the default configuration is completely fine or I don't use them extensively. Have a look at the documentation if you are interested in the details.
- Intellisense: LaTeX Workshop proactively suggests things you might write next. This is especially useful for
\refand\citecommands. - Hover Previews: Hover an equation, a figure, a citation or a reference and LaTeX workshop will show a preview.
- Code folding
- Word counting
- Remote development
- Literate Programming
- ...
Conclusion
This wraps up the blog post on my editor configuration. I hope it contains a few helpful tips and tricks you consider to use. You should also have a look at the other posts in my LaTeX workflow series, that cover everything from my spell checking setup to my literature management. Do you have any other recommendations that might fit in my VS Code setup? Please tell me on Twitter! I will update the article and add new ones as my workflow evolves. So come back regularly or subscribe to my RSS feed.
Acknowledgements
Thanks to Markus Zobel for pointing out typos in the blog post.